I Switched to the Thermal Master P3 Thermal Camera and Here is What Happened
The decision to change tools is rarely dramatic — it is usually the accumulation of small frustrations, incremental needs, and a desire for a better fit. When the reviewer switched from a mix of smartphone thermal attachments and older handheld units to the Thermal Master P3 thermal camera, the goal was practical: have a single tool that combined reliable image quality, useful measurement features, and a workflow that matched real-world tasks such as building inspections, HVAC diagnostics, and occasional outdoor observation. This article examines what happened after that switch, analyzing performance, ergonomics, software, and the everyday utility that matters to buyers.
Introduction: Why change thermal tools?
Thermal imaging is no longer a niche: contractors, electricians, plumbers, HVAC technicians, property inspectors, hobbyists, and even homeowners use thermal cameras to diagnose problems non-invasively. Buyers typically care about image clarity, measurement accuracy, battery life, ease of use, and how results integrate into reporting and records. Some want a compact tool that fits in a pocket; others need a rugged unit that survives jobsite wear. The reviewer wanted better thermal detail than phone attachments could provide, simpler controls than a prosumer unit, and a software workflow that made documentation straightforward.
The Thermal Master P3 landed in that context. Below is a detailed analysis of how it performed against practical expectations.
Detailed review and analysis
First impressions and build quality
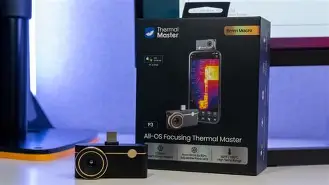
Out of the box, the Thermal Master P3 feels solid without being heavy. The housing uses a grippy, slightly rubberized plastic that resists slips and stands up to everyday knocks. Buttons are tactile and logically arranged: a directional pad plus dedicated capture and power buttons. The balance between a handheld pistol grip and a compact pocketable form factor means it is comfortable for extended inspections without causing fatigue.
Ergonomics matter on long jobs. The P3’s hand contour and button placement reduce the number of times the reviewer needed to set the device down to reach a setting. The display is bright enough for indoor and shaded outdoor conditions; in direct sun the screen is less readable but still usable with some angling. The device includes a threaded mount for tripods or magnetic mounts, which helps with steady shots when documenting signatures or long-term temperature changes.
Image quality and thermal sensitivity
Thermal cameras are judged mostly on how clearly they reveal temperature differences and spatial detail. The Thermal Master P3 produces images with readable thermal contrast across typical use cases — locating hot breakers, finding missing insulation, spotting leaks, and tracing motor bearings. Compared with the reviewer’s older attachments, the P3’s images show fewer compression artifacts and clearer edges, making it easier to interpret hotspots in cluttered scenes.
Color palettes and contrast settings are useful for different tasks. The P3 includes multiple palettes (rainbow, ironbow, gray, etc.) and a clever auto-contrast mode that optimizes visibility for a given scene. Emissivity adjustments and a small set of intuitive measurement tools (single spot, area box with min/mean/max, and isotherm thresholds) give the reviewer what was needed for most diagnostic tasks without diving into a complex menu system.
Measurement tools and accuracy
Accuracy is central for professional use. The P3 provides stable readings for the reviewer’s practical checklist — hotspot identification, relative comparisons, and estimating temperature ranges. For absolute temperature validation, a secondary thermometer or contact probe remains best practice. Where the P3 shines is in repeatability and contextual measurements: the ability to place multiple spots and capture an annotated image speeds documentation.
Area measurement and reporting options let inspectors include min/mean/max values in saved captures. The reviewer appreciated the embedded timestamp and the ability to toggle an overlaid visible camera (fusion) to help locate the thermal data on the physical object — useful when creating client-facing reports that need both thermal evidence and a recognizable visual reference.
Software, connectivity, and workflow
Buyers often overlook software until they need to hand over evidence or build a report. The P3 includes a companion app and basic desktop utility: wireless transfer of images, batch export, and simple report templates. The reviewer found the app fast for downloading captures and tagging images, although advanced users who require deep analysis may find the desktop options limited and will export raw images for third-party post-processing.
Discover deals on Cameras & Photography — updated daily.
View Offers →Connectivity options — USB and Wi-Fi — cover both quick field transfers and tethered operations. The reviewer used Wi-Fi to push a handful of images to a phone for quick client updates and used USB for bulk exports at the end of the day. Export formats include common image types with embedded measurement metadata, which is essential for preserving the temperature context when sharing with colleagues who do not have the companion app.
Battery life and durability in the field
A single battery charge lasted the reviewer through several short jobs and routine inspections, but on a heavy day of continuous use it required swapping in a spare. The P3 supports hot-swapping batteries and charges over a standard USB power delivery source, a convenience that prevents workflow interruption on long jobs.
Durability-wise, the reviewer treated the unit as a daily tool, and it handled reasonable drops and exposure to dust without performance degradation. It is not marketed as fully weatherproof, so users who plan to use it in heavy rain or submerged conditions should use protective covers or look at higher-rated rugged models.
Real-world use case examples
The reviewer used the P3 in several realistic scenarios:
- Electrical inspection: locating overloaded circuits and identifying loose connections in breaker panels where thermal contrast is clear and actionable.
- Building envelope diagnostics: pinpointing missing insulation and thermal bridges around windows and corners to prioritize retrofit work.
- HVAC troubleshooting: verifying ductwork leaks and uneven distribution by scanning air handlers and vents.
- Plumbing leak detection: spotting cooler wet areas behind drywall and under flooring where moisture alters thermal signatures.
- Automotive checks: finding hot spots on brakes, exhaust components, and cooling systems during routine maintenance.
- Outdoor observation: nocturnal wildlife spotting and fence-line patrols, where thermal imaging provides visibility without visible-light illumination.
Across these scenarios, the P3 was a reliable first-pass diagnostic tool. In many cases it identified problems that warranted targeted follow-up (e.g., opening a junction box or removing trim), saving time compared with blind troubleshooting.
Pros & Cons
- Pros
- Comfortable ergonomics for extended use and easy one-handed operation.
- Clear thermal images with useful palettes and a fusion mode for context.
- Intuitive measurement tools for spot and area analysis.
- Wireless and wired connectivity for flexible workflows.
- Battery hot-swap support and USB charging for field convenience.
- Cons
- Not fully weatherproof — requires protection in heavy rain or harsh conditions.
- Advanced analysis and reporting features are limited in the bundled software.
- Battery life is solid for routine tasks but may require spares on intensive days.
- Users who need the highest-resolution thermal imaging still require higher-end models.
How the Thermal Master P3 compares
A comparison helps buyers place the P3 in the market. The table below contrasts it with a typical handheld midrange camera and a smartphone attachment to highlight where the P3 sits in terms of practical performance.
| Feature | Thermal Master P3 | Typical Handheld Midrange | Smartphone Attachment |
|---|---|---|---|
| Thermal Image Quality | Good clarity for diagnostics with useful palettes and fusion | Often higher resolution and sensitivity for professional use | Lower resolution, suitable for quick checks |
| Measurement Tools | Spot, area min/max/mean, isotherm thresholds | Advanced tools, multi-spot, detailed profiling | Basic spot measurement |
| Ergonomics | Handheld comfortable balance, dedicated buttons | Ergonomic pro designs, often heavier | Compact, but phone handling can be awkward |
| Connectivity & Workflow | Wi-Fi + USB, companion app, easy export | Pro software with extensive reporting | Relies on phone app, limited export metadata |
| Battery & Field Use | Removable batteries, USB charge | Longer life on some models, replaceable batteries | Phone battery drain; limited on long jobs |
| Price / Value | Mid-tier value: balance of capability and affordability | Higher cost for professional-grade performance | Most affordable, but limited capability |
Buying guide: What buyers should consider
Choosing a thermal camera depends on the intended use. The reviewer recommends assessing the following areas before committing to the P3 or any other device.
1. Primary use case
Define whether the camera will be used for occasional home checks, regular professional inspections, or specialized work like research or rescue. Occasional users may prioritize price and portability; professionals should weigh measurement accuracy, reporting tools, and durability.
2. Image resolution and sensitivity
Higher resolution and better thermal sensitivity reveal smaller temperature differences and finer detail, which is important for electrical panel inspections and building diagnostics. If the user frequently needs to identify subtle faults, prioritize sensitivity and resolution over minimal cost.
Shop the latest Cameras & Photography picks on Amazon.
Shop Amazon →3. Measurement features
Look for tools that match workflow: multiple spot meters, area statistics, delta-temperature mode, isotherms, and emissivity correction. These features determine whether the device can provide actionable data or only a visual cue that requires secondary verification.
4. Software and reporting
Consider how images will be archived and shared. Adequate Wi-Fi transfer, metadata preservation, and basic reporting templates are critical for professionals who must deliver evidence or invoices. If post-processing is important, check export formats and compatibility with third-party analysis tools.
5. Ergonomics and field convenience
Comfortable grip, intuitive controls, weight, and mounting options affect day-long use. Battery replaceability and charging options (USB vs proprietary chargers) matter for continuity on the jobsite.
6. Ruggedness and operating conditions
Check ingress ratings and operating temperature ranges. For outdoor or industrial environments, an IP rating and shock resistance can save a tool from early retirement. If conditions are harsh, prioritize ruggedized models or protective accessories.
7. Budget and total cost of ownership
Evaluate not only the purchase price but also accessories like spare batteries, protective cases, calibration services, and software licenses. A slightly more expensive model with better software might reduce labor time and improve report quality, offsetting the higher upfront cost.
Tips for getting the most out of the Thermal Master P3
- Calibrate expectations: Use the P3 for diagnostics and pattern recognition. For legal or contract-level temperature verification, cross-check with contact thermometers when necessary.
- Learn emissivity basics: Adjust emissivity settings for accurate surface temperature estimation — especially for shiny metals and mixed materials.
- Use fusion mode: When presenting findings to non-technical clients, fused thermal+visual images reduce confusion over where the hotspot is located.
- Carry spare batteries: Hot-swap batteries or a portable power bank with USB PD keeps the workflow moving on long days.
- Organize captures in the field: Tag images and add brief notes on-site. This saves time when building reports later.
- Protect the lens: The thermal lens is sensitive — avoid touching it and store the camera with a lens cap or in a padded case.
Final thoughts and conclusion
Switching to the Thermal Master P3 changed the reviewer’s day-to-day thermal workflow in tangible ways. It provided clearer thermal images than smartphone attachments, more comfortable handling than many compact units, and a balanced set of measurement and connectivity features needed for routine inspections. It is not a replacement for high-end laboratory-grade thermal imagers, nor is it intended to be fully weatherproof for extreme environments, but it fills the practical middle ground very well.
For contractors and technicians who need a dependable tool for diagnostics and documentation, the Thermal Master P3 is a compelling option: it reduces the time spent hunting problems, improves the clarity of client communication, and integrates well into common inspection workflows. For occasional users, it offers a pleasant, straightforward experience with enough capability to grow into more advanced tasks. Ultimately, the decision should be guided by the buyer’s typical use cases, desired features, and whether the bundled software and reporting tools match the business or hobby workflow.
After the switch, the reviewer found fewer false starts, faster confirmations of issues, and cleaner handoffs when delivering findings. Those outcomes — saved time and clearer evidence — are the reasons the Thermal Master P3 earned a place in the reviewer’s regular toolkit.